
티스토리 뷰
라스트 오브 어스 1 라오어 호텔 로비 공략 - 모든 수집품: 유물, 반딧불이 펜던트, 만화, 교육 매뉴얼, 작업대, 금고, 선택적 대화
뉴스정보 2022. 9. 12. 04:09모든 수집품 을 포함하여 라스트 오브 어스 1의 호텔 로비 연습 이 필요하십니까 ? 이 Last of Us 1 가이드 에서는 Pittsburgh 챕터 의 일부인 Hotel Lobby 에서 100% 완료 를 달성하는 방법을 보여 드리겠습니다 .
조엘과 엘리가 피츠버그의 깊숙한 곳으로 가려고 하는 동안 호텔 로비 에서 찾을 수 있는 유물 2 개 , 반딧불이 펜던트 1개 , 만화 1 개 , 교육 매뉴얼 2 개 , 작업대 1개 , 금고 1 개 , 선택적 대화 4 개가 있습니다.
라스트 오브 어스 1: 호텔 로비 연습

이미지:
당신은 여전히 혼자이고 포세이큰 이지만 적어도 지금은 멋진 호텔 로비에 있습니다. 이 지역은 안전하므로 주변을 찌를 수 있습니다. 오른쪽 카운터에 보충제가 있으니 꼭 챙겨가세요. 리셉션 구역에서 기다리면 목록에 없는 선택적 대화 도 있지만 게임에서는 필요하지 않습니다.
선택적 대화 #1

이미지:
들어간 곳의 왼쪽에 바가 있습니다. 바 뒤에는 소박한 커피 메이커가 있습니다. 선택적 대화 를 위해 그것과 상호 작용하십시오 .
<hr data-ke-style="style1" style="margin: 20px auto 0px; border: none; font-size: 0px; line-height: 0; background: url("../image/divider-line.svg") center 0px / 200px 420px no-repeat; cursor: pointer !important; width: 64px; height: 4px; padding: 20px; color: rgb(51, 51, 51); font-family: -apple-system, BlinkMacSystemFont, "Helvetica Neue", "Apple SD Gothic Neo", Arial, sans-serif; font-style: normal; font-variant-ligatures: normal; font-variant-caps: normal; font-weight: 400; letter-spacing: normal; orphans: 2; text-align: start; text-indent: 0px; text-transform: none; white-space: normal; widows: 2; word-spacing: 0px; -webkit-text-stroke-width: 0px; text-decoration-thickness: initial; text-decoration-style: initial; text-decoration-color: initial;">


이미지:
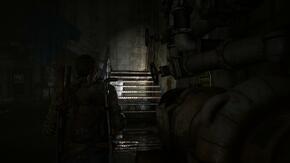
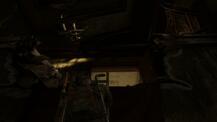
커피 머신이 있는 방에서 사다리를 잡으세요. 주운 곳의 반대편으로 옮기고 위로 올라가면 일부 무기 부품 을 얻을 수 있습니다 . 다시 내려와서 사다리를 잡습니다. 이번에는 계단 근처에 있는 난간의 부러진 부분에 버팀목을 세우고 위로 올라오려고 합니다.
<hr data-ke-style="style1" style="margin: 20px auto 0px; border: none; font-size: 0px; line-height: 0; background: url("../image/divider-line.svg") center 0px / 200px 420px no-repeat; cursor: pointer !important; width: 64px; height: 4px; padding: 20px; color: rgb(51, 51, 51); font-family: -apple-system, BlinkMacSystemFont, "Helvetica Neue", "Apple SD Gothic Neo", Arial, sans-serif; font-style: normal; font-variant-ligatures: normal; font-variant-caps: normal; font-weight: 400; letter-spacing: normal; orphans: 2; text-align: start; text-indent: 0px; text-transform: none; white-space: normal; widows: 2; word-spacing: 0px; -webkit-text-stroke-width: 0px; text-decoration-thickness: initial; text-decoration-style: initial; text-decoration-color: initial;">
유물 #1: 직원 참고 사항

이미지:
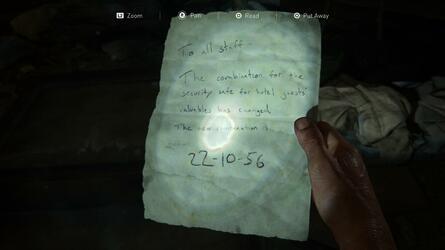
사다리를 놓고 2층으로 올라간 후 부서진 계단 뒤에서 몸을 웅크리고 반대편으로 가세요. Open to Staff 라는 수화물 케이스에 유물 이 있습니다 .
안전 #1


이미지:
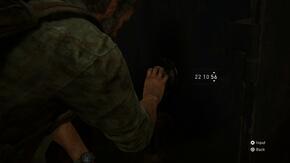
Note to Staff 라는 이름 의 Artefact 가 금고 를 언급한 것을 눈치채셨을 것입니다 . 다시 1층으로 내려와 건물의 오른쪽에 있는 리셉션 구역 뒤로 가십시오(들어왔을 때 그대로). 금고 는 뒷방에 있고 금고 코드 조합은 22-10-56 입니다. 열어봐
훈련 매뉴얼 #1: Shiv Reinforcement


이미지:
금고 를 열면 안에 훈련 매뉴얼 이 있습니다. 이것은 당신이 훨씬 더 효과적인 Shivs 를 만드는 데 도움이 될 것 입니다. 다음 번에 작업대 를 찾을 때 유용할 몇 가지 무기 부품 도 있습니다 .
선택적 대화 #2: 엘리의 농담 4

이미지:
다시 사다리를 타고 2층으로 올라가서 엘리의 농담 을 더 많이 들을 수 있는 선택적 대화 기회가 생길 때까지 엘리베이터 문 앞에서 참을성 있게 주변을 기다립니다 .
<hr data-ke-style="style1" style="margin: 20px auto 0px; border: none; font-size: 0px; line-height: 0; background: url("../image/divider-line.svg") center 0px / 200px 420px no-repeat; cursor: pointer !important; width: 64px; height: 4px; padding: 20px; color: rgb(51, 51, 51); font-family: -apple-system, BlinkMacSystemFont, "Helvetica Neue", "Apple SD Gothic Neo", Arial, sans-serif; font-style: normal; font-variant-ligatures: normal; font-variant-caps: normal; font-weight: 400; letter-spacing: normal; orphans: 2; text-align: start; text-indent: 0px; text-transform: none; white-space: normal; widows: 2; word-spacing: 0px; -webkit-text-stroke-width: 0px; text-decoration-thickness: initial; text-decoration-style: initial; text-decoration-color: initial;">


이미지:
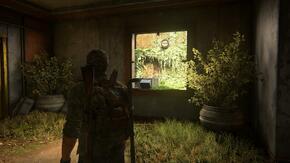
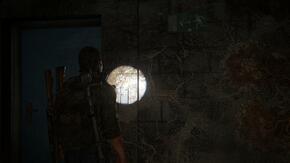
모든 작업이 끝나면 계속해서 계단을 올라가 열린 창문을 통해 옥상 공간으로 올라갑니다. 불행히도 이곳은 도적들로 가득 차 있기 때문에 잘 준비되어 있는지 확인하십시오. 분명히 당신은 호텔에 있으므로 이 섹션을 은밀하게 통과할 수 있는 기회가 많이 있습니다. 방에서 방으로 이동하고 주의를 끌기 위해 병과 벽돌을 사용합니다. 또는 총격을 가하는 것도 하나의 옵션입니다. 열린 창문과 복도는 측면 공격을 받을 가능성이 있음을 의미합니다. 모든 사람을 죽였을 때 이 지역에서 실제로 비축할 수 있는 보급품을 찾기 위해 주변을 뒤지는 것이 좋습니다. 계속 진행하기 전에 모든 호텔 방을 소총으로 샅샅이 살펴보세요.


이미지:
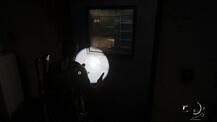
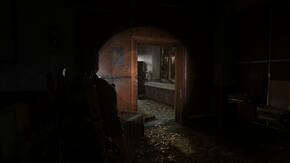
모든 것을 모았다고 확신하면 벽에 글씨가 써져 있는 저 멀리 복도로 내려가서 오른쪽에 있는 계단으로 들어가 계단을 올라갑니다. 여기에는 더 많은 도적들이 있으므로 동일한 규칙이 적용됩니다. 원한다면 소리를 높이거나 다양한 방의 덮개를 사용하여 몰래 들어가서 하나씩 죽이십시오. 다시 말하지만, 여기에 더 많은 리소스가 있으므로 필요한 모든 것을 비축하십시오.
<hr data-ke-style="style1" style="margin: 20px auto 0px; border: none; font-size: 0px; line-height: 0; background: url("../image/divider-line.svg") center 0px / 200px 420px no-repeat; cursor: pointer !important; width: 64px; height: 4px; padding: 20px; color: rgb(51, 51, 51); font-family: -apple-system, BlinkMacSystemFont, "Helvetica Neue", "Apple SD Gothic Neo", Arial, sans-serif; font-style: normal; font-variant-ligatures: normal; font-variant-caps: normal; font-weight: 400; letter-spacing: normal; orphans: 2; text-align: start; text-indent: 0px; text-transform: none; white-space: normal; widows: 2; word-spacing: 0px; -webkit-text-stroke-width: 0px; text-decoration-thickness: initial; text-decoration-style: initial; text-decoration-color: initial;">
선택적 대화 #3

이미지:
호텔 2층에 있는 모든 사람을 성공적으로 죽이고 나면 호텔 반대편 계단에 있는 304호실로 이동하십시오. 여기 서랍 에는 보충제 가 있지만 욕조에는 시체 2구가 있습니다. Ellie가 올 때까지 기다리면 Optional Conversation 이 실행 됩니다. 벽의 구멍을 통과하면 연결된 침실에도 더 많은 무기 부품 이 있습니다.
<hr data-ke-style="style1" style="margin: 20px auto 0px; border: none; font-size: 0px; line-height: 0; background: url("../image/divider-line.svg") center 0px / 200px 420px no-repeat; cursor: pointer !important; width: 64px; height: 4px; padding: 20px; color: rgb(51, 51, 51); font-family: -apple-system, BlinkMacSystemFont, "Helvetica Neue", "Apple SD Gothic Neo", Arial, sans-serif; font-style: normal; font-variant-ligatures: normal; font-variant-caps: normal; font-weight: 400; letter-spacing: normal; orphans: 2; text-align: start; text-indent: 0px; text-transform: none; white-space: normal; widows: 2; word-spacing: 0px; -webkit-text-stroke-width: 0px; text-decoration-thickness: initial; text-decoration-style: initial; text-decoration-color: initial;">


이미지:
이 층에서 이동할 준비가 되면 계단으로 올라가십시오. 상단에 승강 문이 열려 있으므로 프롬프트와 상호 작용하여 열 수 있습니다. 그런 다음 반대편에 있는 사다리를 올라갑니다.

이미지:
리프트 샤프트를 따라 움직이며 리프트 위로 떨어집니다. Ellie가 당신과 합류할 때까지 기다렸다가 그녀를 선반 위로 올려주세요. 불가피하게 엘리베이터가 무너지고 엘리와 헤어지게 됩니다. 수영을 할 시간입니다.


이미지:
허리 높이의 물로 다음 방으로 수영하고 똑바로 가십시오. 그 위에 출구 표시가 있는 문 쪽으로 파편을 뛰어 넘으십시오. 즉시 눈에 띄지 않을 수도 있지만 여기에 계단이 있으므로 물 속으로 잠수하고 다음으로 West Tower B1이라고 표시된 출입구가 있는 방으로 나올 수 있을 때까지 터널을 따라 가십시오.


이미지:
이 방에는 길을 막고 있는 문이 있습니다. 하지만 다시 한 번 문 앞에서 물 속으로 잠수하면 터널을 따라 갈 수 있습니다.


이미지:
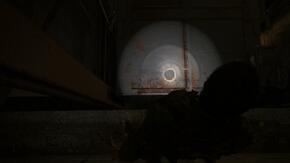
계속 앞으로 나아가면 Joel이 방독면을 착용할 것이므로 어떤 일이 일어날지 충분히 확신할 수 있습니다. 그렇죠? 감염된 쥐 무리가 당신을 향해 돌진하지만 위험하지 않으므로 계속 전진하십시오. 오른쪽 방에 있는 발전기에 주의하세요. 곧 필요할 것입니다.


이미지:
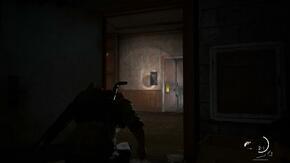
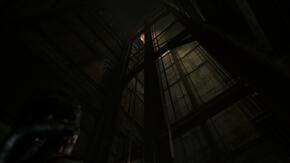
지금은 무너진 지붕을 경사로로 사용하여 2층으로 올라가세요. 발전기 오른쪽에 있습니다. 호텔 방에서 복도로 나가면 바로 맞은편에 보안실이 있습니다. 여기 안으로 들어가세요.
<hr data-ke-style="style1" style="margin: 20px auto 0px; border: none; font-size: 0px; line-height: 0; background: url("../image/divider-line.svg") center 0px / 200px 420px no-repeat; cursor: pointer !important; width: 64px; height: 4px; padding: 20px; color: rgb(51, 51, 51); font-family: -apple-system, BlinkMacSystemFont, "Helvetica Neue", "Apple SD Gothic Neo", Arial, sans-serif; font-style: normal; font-variant-ligatures: normal; font-variant-caps: normal; font-weight: 400; letter-spacing: normal; orphans: 2; text-align: start; text-indent: 0px; text-transform: none; white-space: normal; widows: 2; word-spacing: 0px; -webkit-text-stroke-width: 0px; text-decoration-thickness: initial; text-decoration-style: initial; text-decoration-color: initial;">
유물 #2: 호텔 키카드


이미지:
경비실 , 발전기가 있는 방 위 책상에 Hotel Keycard 라는 유물 이 있습니다. 이것은 진행을 위해 필요하지만 총 수집품에 포함됩니다.
<hr data-ke-style="style1" style="margin: 20px auto 0px; border: none; font-size: 0px; line-height: 0; background: url("../image/divider-line.svg") center 0px / 200px 420px no-repeat; cursor: pointer !important; width: 64px; height: 4px; padding: 20px; color: rgb(51, 51, 51); font-family: -apple-system, BlinkMacSystemFont, "Helvetica Neue", "Apple SD Gothic Neo", Arial, sans-serif; font-style: normal; font-variant-ligatures: normal; font-variant-caps: normal; font-weight: 400; letter-spacing: normal; orphans: 2; text-align: start; text-indent: 0px; text-transform: none; white-space: normal; widows: 2; word-spacing: 0px; -webkit-text-stroke-width: 0px; text-decoration-thickness: initial; text-decoration-style: initial; text-decoration-color: initial;">

이미지:
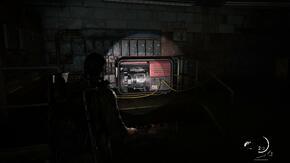
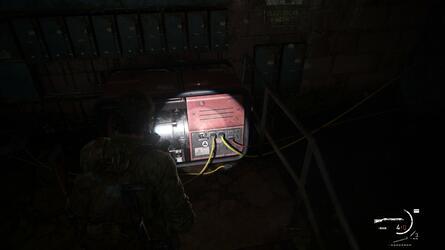
이 시점에서 무기를 재장전하고 건강을 보충하는 것이 좋습니다. 돌아서면 리모콘이 멈추고 몇 대가 더 달려올 것이기 때문입니다. 잘 준비되었는지 확인한 다음 발전기로 돌아가 시작하십시오.

이미지:
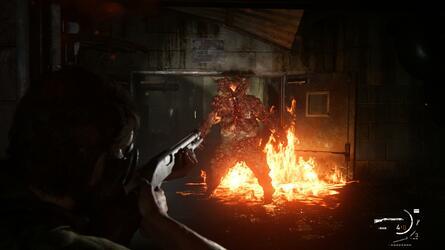
조명이 켜져 있습니다. 이는 멋진 소식입니다. 하지만 이제 꼬리에 블로터가 있습니다. 여기에서 기동할 공간이 많지 않으므로 위험을 감수하지 말고 못 폭탄 과 화염병 과 같은 아이템을 사용 하여 최대한 빨리 피해를 입히십시오. 즉석 죽이기 때문에 Bloater가 당신을 캡처하게하지 마십시오. 여기 주변에 다른 클리커가 있다는 것을 기억하십시오. 따라서 재치를 유지하고 그들이 뒤에서 잡아당기지 않도록 하십시오. 샷건 은 특히 근접전에서 효과적입니다 .

이미지:
감염자를 모두 물리치면 Bloater가 온 방으로 이동하여 금속 계단을 올라갑니다. 출구 문을 통해 왼쪽으로 이동하고 감염된 모든 덤불을 통과하는 복도를 따라가십시오. 옆에 보안 패널이 있는 파란색 문이 나타납니다. 앞에서 찾은 호텔 키 카드 를 스캔하고 계단으로 나가십시오.
작업대 #1

이미지:
호텔 키 카드 를 스캔한 직후 계단을 올라 복도로 나옵니다. 사무실 문 뒤에는 작업대 가 있습니다. 필요한 경우 컴퓨터 근처 책상에 무기 부품 이 있습니다 .
<hr data-ke-style="style1" style="margin: 20px auto 0px; border: none; font-size: 0px; line-height: 0; background: url("../image/divider-line.svg") center 0px / 200px 420px no-repeat; cursor: pointer !important; width: 64px; height: 4px; padding: 20px; color: rgb(51, 51, 51); font-family: -apple-system, BlinkMacSystemFont, "Helvetica Neue", "Apple SD Gothic Neo", Arial, sans-serif; font-style: normal; font-variant-ligatures: normal; font-variant-caps: normal; font-weight: 400; letter-spacing: normal; orphans: 2; text-align: start; text-indent: 0px; text-transform: none; white-space: normal; widows: 2; word-spacing: 0px; -webkit-text-stroke-width: 0px; text-decoration-thickness: initial; text-decoration-style: initial; text-decoration-color: initial;">


이미지:
Workbench 출구 오른쪽에 있는 복도를 따라 계속 내려가십시오 . 이 주방에는 리모콘이 있지만 도둑이 빠르게 제거할 것입니다. 불행히도 그 도적들이 당신을 찾고 있습니다. 낮은 프로필을 유지하고 은밀하게 그들을 모두 죽이면 상황이 남쪽으로 갈 경우에 대비하여 무기를 다시 장전할 수 있습니다. 필요한 경우 냉동실에 몇 가지 추가 용품이 있습니다. 작업이 끝나면 식당 구역으로 가서 방의 맨 끝에 있는 사다리를 잡으십시오. 근처의 난간에 기대고 위로 올라갑니다. 당신은 다시 쫓겨날 것이므로 준비하십시오. 그러나 Ellie가 당신을 지원합니다. 휴 !
<hr data-ke-style="style1" style="margin: 20px auto 0px; border: none; font-size: 0px; line-height: 0; background: url("../image/divider-line.svg") center 0px / 200px 420px no-repeat; cursor: pointer !important; width: 64px; height: 4px; padding: 20px; color: rgb(51, 51, 51); font-family: -apple-system, BlinkMacSystemFont, "Helvetica Neue", "Apple SD Gothic Neo", Arial, sans-serif; font-style: normal; font-variant-ligatures: normal; font-variant-caps: normal; font-weight: 400; letter-spacing: normal; orphans: 2; text-align: start; text-indent: 0px; text-transform: none; white-space: normal; widows: 2; word-spacing: 0px; -webkit-text-stroke-width: 0px; text-decoration-thickness: initial; text-decoration-style: initial; text-decoration-color: initial;">
만화 #1: 강착


이미지:
Ellie가 적기를 죽인 후 사다리를 타고 회의실로 이동하십시오. 왼쪽에 있는 복도를 나와 식당으로 들어가 선반을 따라 움직이세요. 모든 의자 근처의 커피 테이블에 Accretion이라는 만화가 있습니다 . 엘리에게 돌아가기 전에 이 지역의 모든 보급품을 모으십시오.
반딧불이 펜던트 #1: Reed의 반딧불이 펜던트


이미지:
엘리와 재회한 후 계단을 내려가 왼쪽에서 두 번째 문인 여자화장실을 찾으세요. 먼 구석에 있는 화장실 칸막이에서 Reed's Firefly Pendant 라는 Firefly Pendant 를 찾을 수 있습니다 .
훈련 매뉴얼 #2: 근접 매듭


이미지:
계단을 가던 곳에서 복도를 따라 계속 내려가면 탁자 가장자리에서 Melee Knots 라는 훈련 매뉴얼 을 찾을 수 있습니다. 이것은 거의 놓칠 수 없습니다.
선택적 대화 #4

이미지:
계속해서 볼룸 형태의 공간으로 이동하여 방 뒤쪽의 해변 장면 배경 앞에 서십시오. Ellie는 이를 관찰하여 선택적 대화 기회를 유발합니다. 여기에는 몇 가지 프롬프트가 있으므로 대화를 계속 진행하십시오.
<hr data-ke-style="style1" style="margin: 20px auto 0px; border: none; font-size: 0px; line-height: 0; background: url("../image/divider-line.svg") center 0px / 200px 420px no-repeat; cursor: pointer !important; width: 64px; height: 4px; padding: 20px; color: rgb(51, 51, 51); font-family: -apple-system, BlinkMacSystemFont, "Helvetica Neue", "Apple SD Gothic Neo", Arial, sans-serif; font-style: normal; font-variant-ligatures: normal; font-variant-caps: normal; font-weight: 400; letter-spacing: normal; orphans: 2; text-align: start; text-indent: 0px; text-transform: none; white-space: normal; widows: 2; word-spacing: 0px; -webkit-text-stroke-width: 0px; text-decoration-thickness: initial; text-decoration-style: initial; text-decoration-color: initial;">


이미지:
무대에서 피아노를 난간 위로 밀어 올린 다음 위로 올라가서 나옵니다. Western Balcony의 이중 문을 통과하여 비계에 올라타 금융 지구 로 가십시오 .
'게임' 카테고리의 다른 글
| 라스트 오브 어스 1 라오어 공략, 금융 지구 둘러보기 - 모든 수집품: 유물, 작업대, 시브 도어, 선택적 대화 (0) | 2022.09.12 |
|---|---|
| 라스트 오브 어스 1 라오어 공략, 다운타운 둘러보기 - 모든 수집품: 유물, 반딧불이 펜던트, 칼날 문, 금고 (0) | 2022.09.12 |
| 라스트 오브 어스 1 라오어, 벽 너머 공략 - 모든 수집품: 유물, 반딧불이 펜던트, 선택적 대화 (0) | 2022.09.12 |
| 원피스 극장판, 영화 전체 목록: 빨간 의상 (0) | 2022.09.12 |
| 코난 엑자일 공략 Conan Exiles Age Of Sorcery (0) | 2022.09.12 |
- 닌텐도 스위치
- 포트나이트
- 가격
- 가이드
- 발헤임
- 오버워치 2
- 원피스
- 바탕화면
- 원신
- 고화질 사진
- 업데이트
- PS5
- 게임
- 다운로드
- 어쌔신 크리드 발할라
- 타워 오브 판타지
- 한글패치
- 티어
- 후기
- 호그와트 레거시
- 엘든링
- 스팀
- pc
- 가이드 팁
- 디아블로 4
- 공략
- 파이널 판타지 16
- 사이버펑크 2077
- 리뷰
- 쿠폰
| 일 | 월 | 화 | 수 | 목 | 금 | 토 |
|---|---|---|---|---|---|---|
| 1 | 2 | 3 | 4 | 5 | ||
| 6 | 7 | 8 | 9 | 10 | 11 | 12 |
| 13 | 14 | 15 | 16 | 17 | 18 | 19 |
| 20 | 21 | 22 | 23 | 24 | 25 | 26 |
| 27 | 28 | 29 | 30 | 31 |